How To Reset the Photoshop Preferences File
If you are having trouble with Photoshop and are getting new errors when running an action; you may benefit from resetting your Photoshop Preferences File. There are three different methods you can use to reset your photoshop preferences file.
Method 1: Reset upon Photoshop Launch
1. Quit Photoshop.
2. As you restart Photoshop, press and hold Alt+Control+Shift (Windows) or Option+Command+Shift (Mac OS). You will be prompted to delete the current settings. Note: The new preferences file is created when you re-launch Photoshop.
Method 2: Reset Preferences on Quit
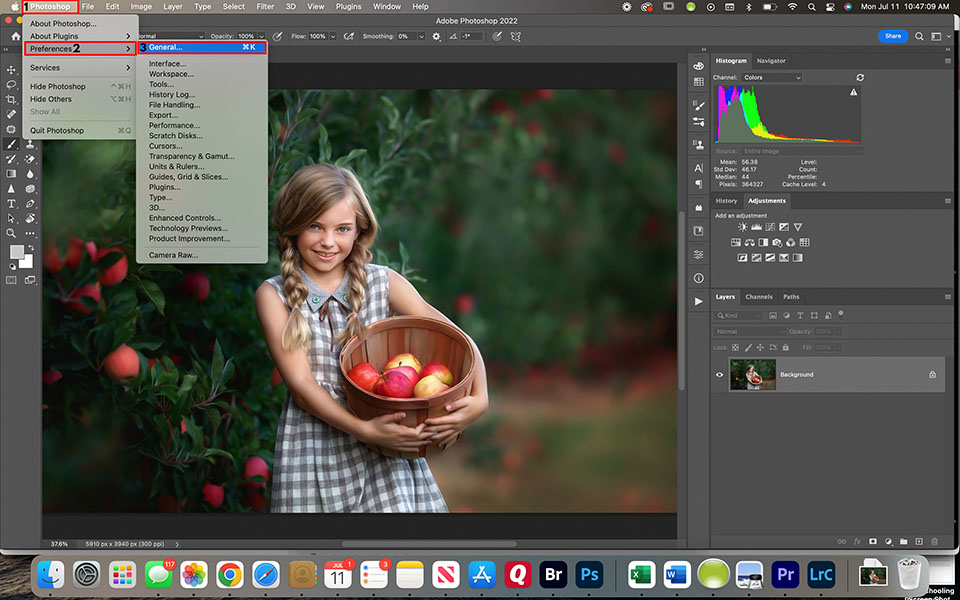
1. Navigate to Photoshop > Preferences > General.
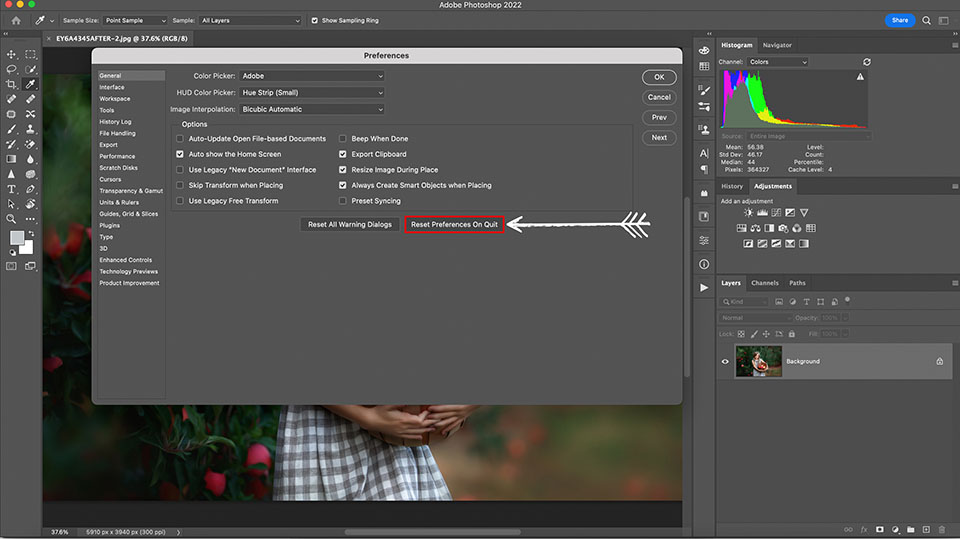
2. Click “Reset Preferences on Quit.”
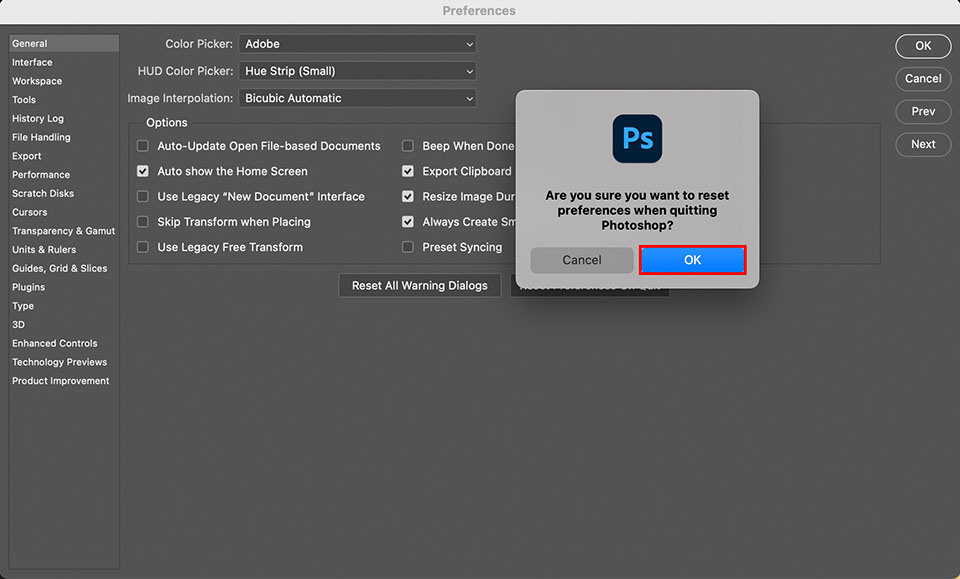
3. Click “OK” for the following pop-up “Are you sure you want to reset preferences when quitting photoshop?”
4. Quit Photoshop.
5. Open Photoshop. Note: The new preferences file is created when you re-launch Photoshop.
Method 3: Manually Reset the Photoshop Preferences File
Here is how to locate and reset the Photoshop preferences file. This method allows you to save your current file and restore it if the problem isn’t resolved when Photoshop is relaunched. It is also the most complete method to restore to default settings.
1. Quit Photoshop.
2. Navigate to locate the following folder:
macOS: Users/[user name]/Library/Preferences/Adobe Photoshop [version] Settings
Windows 10: Users/[user name]/AppData/Roaming/Adobe/Adobe Photoshop [version]/Adobe Photoshop [version] Settings
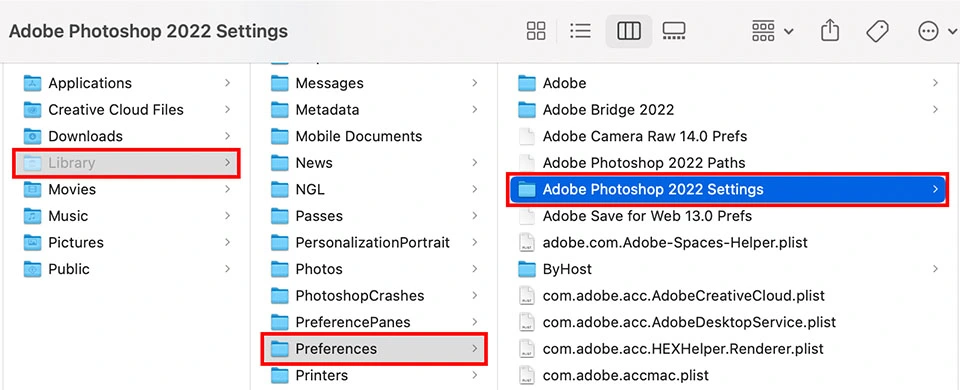
3. Drag the entire “Adobe Photoshop [Version] Settings” folder to the desktop or to another location where you can easily find it.
4. Re-open Photoshop; it will automatically create a new file.
If you would like to see more information from Adobe, you can find it at the following link:
https://helpx.adobe.com/photoshop/using/preferences.html