How To Install & Use Lightroom Presets in Lightroom
To add and install presets into Lightroom there are a few methods to import lightroom presets and add them, depending on which version of Lightroom you use. We have included the methods for the different install versions below. If you are uncertain which version of Lightroom you are using, click on “Help” then “System Info”. The version you are using will be listed at the top of the box.
How to Import Presets into
Lightroom CC
-
- Open your zip file.
- Save the Greater than Gatsby preset folder in an easy to find location on your computer in preparation to import the Lightroom presets.
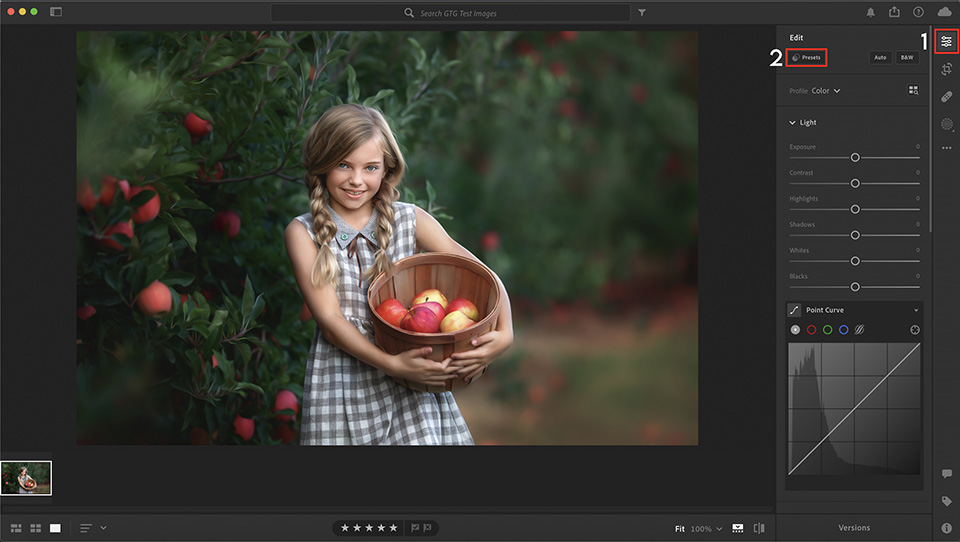
- Open Lightroom, then open the edit panel and then open the presets panel as show in the image below.
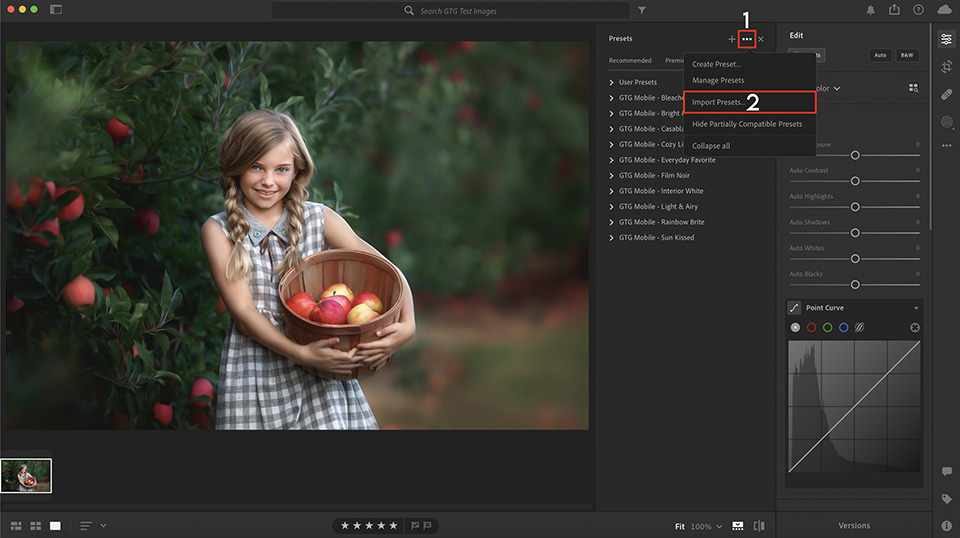
- Click the “…” at the top right of the presets panel and select “IMPORT PRESETS”.
- Select the folder of the collection of presets you want to import. Note: You will import the whole folder, not the individual presets.
- Your presets will install and be available to use in the presets panel.
How to Add Presets to
Lightroom Classic CC
-
- Open your zip file.
- Save the Greater Than Gatsby preset folder in an easy to find location on your computer.
- Copy (Command + C on a Mac or CTRL + C on a PC) the entire preset collection folder.
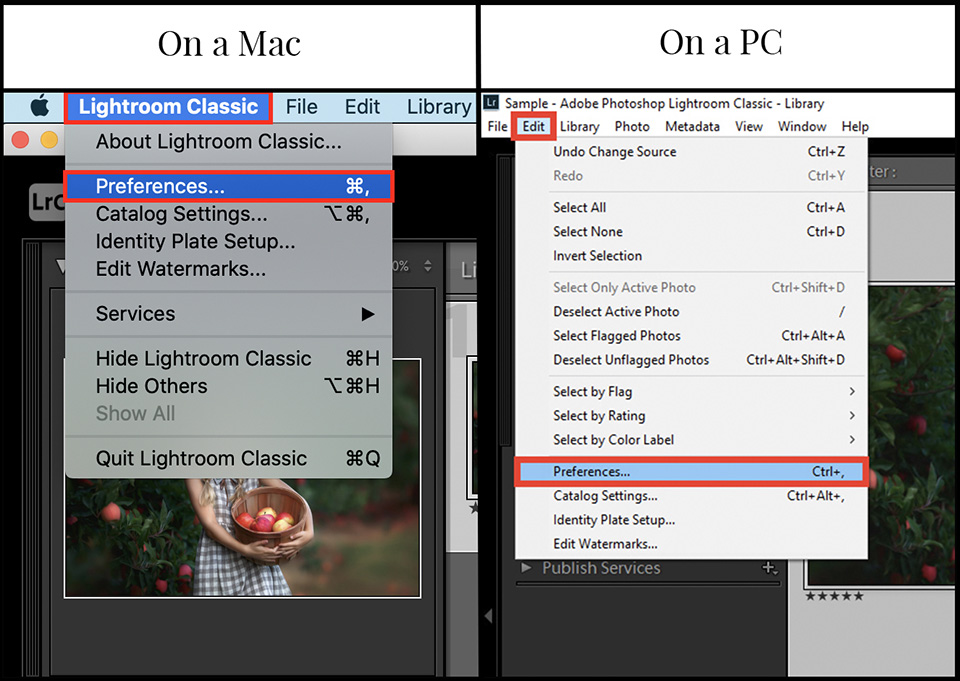
- Open Lightroom and select the following from the menu bar:
- Mac – Lightroom Classic > Preferences
- PC – Edit > Preferences
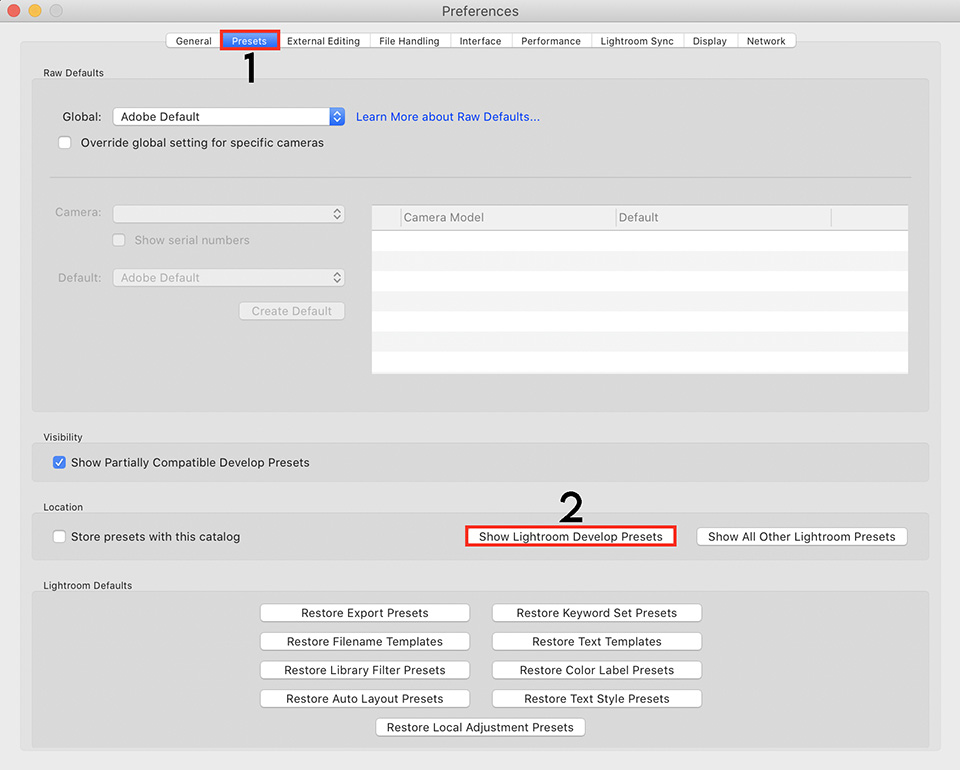
- When the Preferences box pops up, make sure you are on the Presets tab, and then click the Show Lightroom Develop Presets button. *Note: It should take you to the location below for your computer. Turn on your show hidden files option to be sure you see locations below. Once in the “Camera Raw” folder, navigate to the “Settings” folder.
- Mac: / Library / Application Support / Adobe / CameraRaw / Settings
- Windows: \ ProgramData \ Adobe \ CameraRaw \ Settings
- Paste (Command + V on a Mac or CTRL + V on a PC) the preset collection folder into the Settings folder.
- Restart Lightroom. Your presets can be found in the Preset panel of Lightroom Classic and Camera Raw.
How to Use & Install Mobile Presets
How to Install Mobile Presets
1. Get the DNG files onto your phone via download and unzip or email.
- IMPORTANT: Your phone must have unzipping software installed on it.
- For older iPhones, download a free app such as iZip to unzip your files.
- PRO TIP: Make Your Presets Clickable and Easier to Use (See FAQs Below).
2. Open up the Adobe Lightroom App and create and sign in to your free account.
3. Create a new Folder by clicking ‘New Item’.
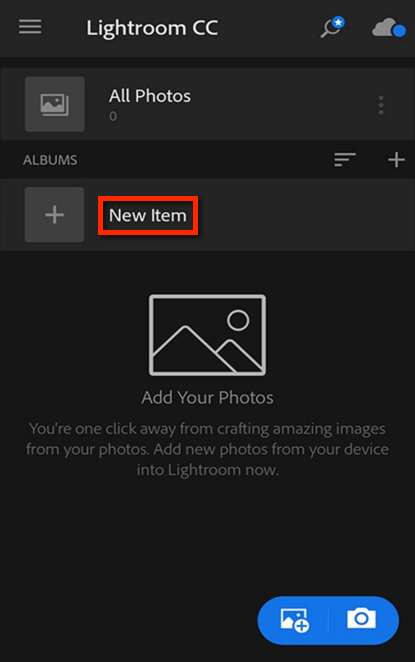
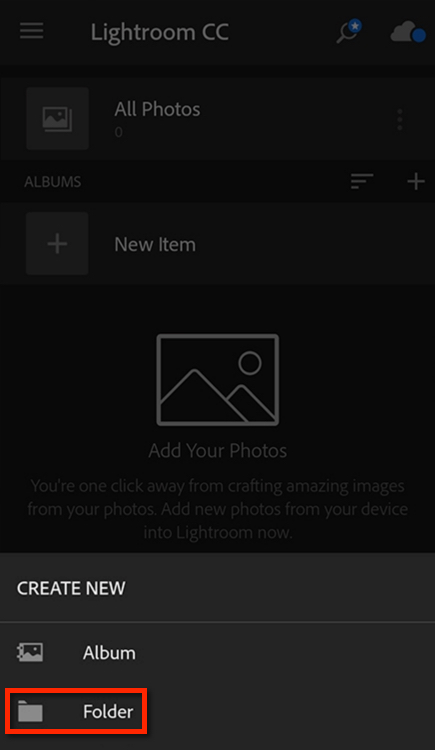
4. Click ‘CREATE NEW – Folder’ at the bottom and then name the folder ‘Gatsby Presets’.
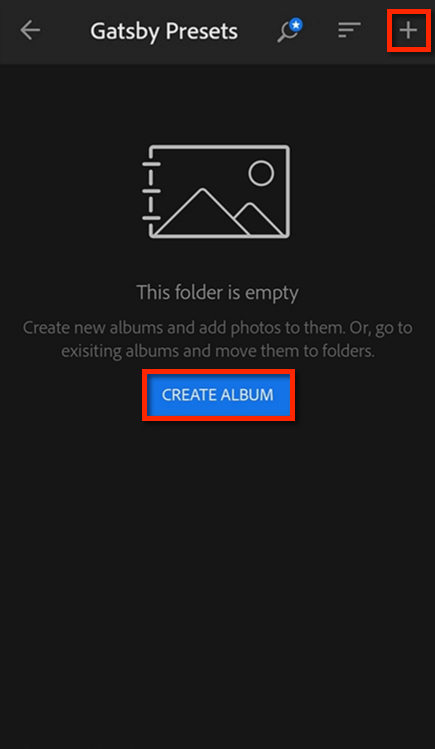
5. Click into the Gatsby Presets folder you created and click ‘CREATE ALBUM’ or the ‘+’ symbol in upper right corner. Add an album for each preset collection.
6. Add your DNG files to each album by clicking the 3 dots to the right in line with the album name.
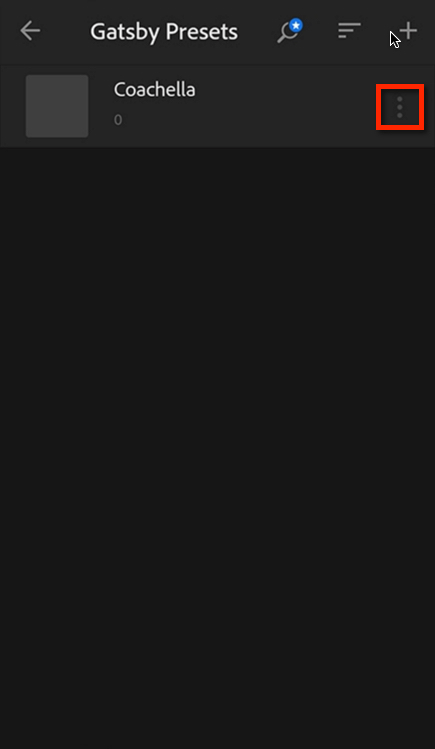
7. Then click ‘Add Photos’.
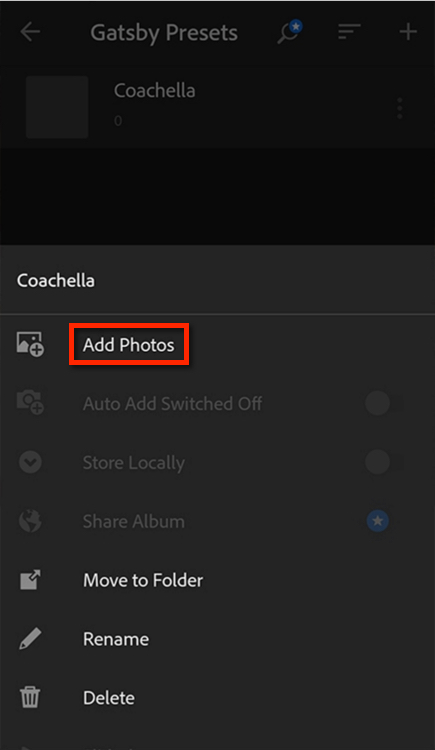
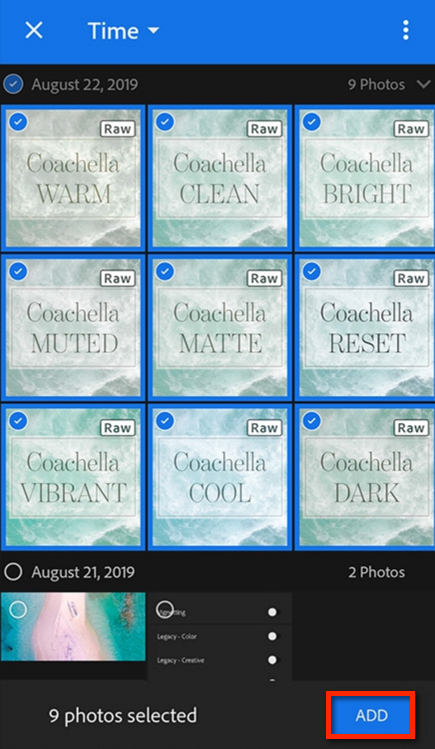
8. Select your dng files to add and then click the ‘ADD’ button.
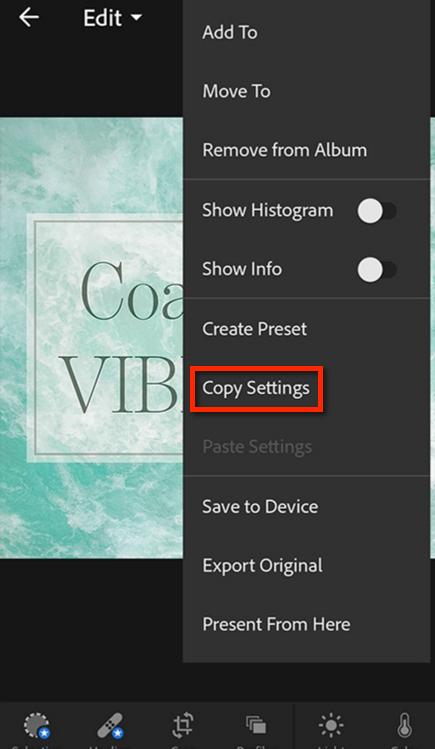
9. To use presets, select Edit and then ‘Copy Settings’ of a DNG file.
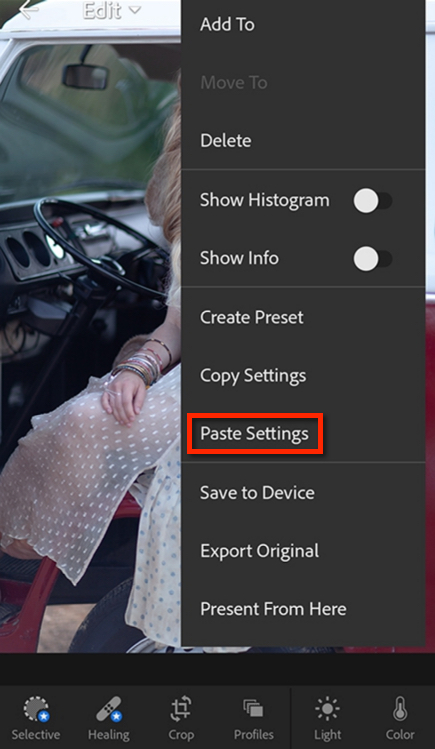
10. Then ‘Paste Settings’ to image you want to apply it to.
If you are having issues getting your presets to synch from your Lightroom CC Desktop to your Lightroom Mobile, your issue is probably a lack of cloud storage. Follow these few steps to ensure you have enough storage for the presets to automatically load into Lightroom Mobile.
1. Ensure you are logged into your Adobe account on both your desktop & phone.
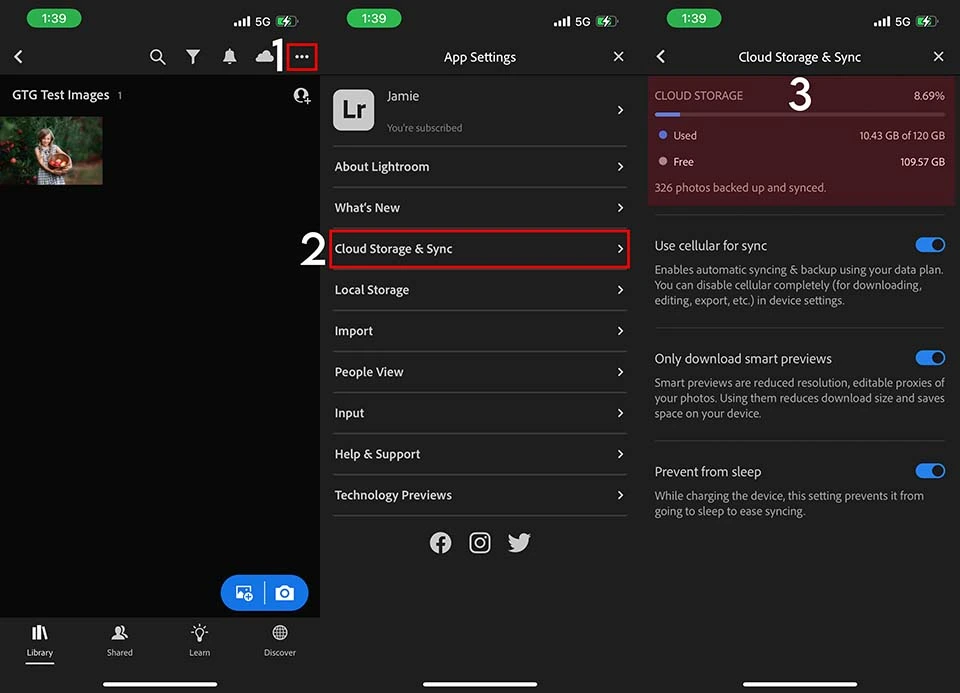
2. View the status of your cloud storage by clicking the cloud located in the top right corner of the desktop app.
3. Click the “3 Dots” icon in the upper right corner then click “Cloud Storage & Sync” so you can view your available storage from your phone.
4. If your storage is full, you can either delete files or upgrade your Adobe photography plan per the guidelines found here:
https://helpx.adobe.com/x-productkb/global/upgrade-creative-cloud-storage.html
Make Your Mobile Presets Clickable
You can make your presets easier to use without copying and pasting each time you want to apply settings. To do this you’ll need to go to each DNG preset, select it, click the 3 dots at top right, select ‘Create Preset’, name the preset the same name it already has, and then for the first image in each collection create a new Preset Group to contain your presets and name it the the same as the collection you are setting up. Once you have done this task for each preset and added each preset to your new Presets Group, your presets will then be available in the presets panel as their own group which will allow you to select and preview or apply each preset with one click.
How To Get Files On Your Phone
You can either download directly and unzip on your phone or you can download and unzip on your desktop and then email them to an email account you can check on your phone. To unzip directly on your phone you will need to download an app that unzips files from either the Apple Store (for iphones) or Google Play Store (for androids). If you don’t want to install any new apps on your phone, just email them to your phone.
Yes, each collection comes with both DNG files (for mobile use on the free app) and XMP files (for both desktop and mobile use). The XMP files can be installed and used on desktop in Creative Cloud, but should only be on Jpeg files.
Clean Up Your Mobile Presets Folder
Clean up your presets folder. Click the 3 dots at top right of the presets panel and click ‘MANAGE PRESETS’ and uncheck any/all of the default presets loaded with Lightroom that you won’t want to use in any of your editing.